Tuesday, July 24, 2012

Enabling Compiz On Linux Mint 13 (MATE)

Enabling Compiz On Linux Mint 13 (MATE) can be a bit of a pain but after a bit of scratching around and testing I've found the following works:

1.  Install Compiz:
   sudo apt-get install compiz compiz-plugins
   compiz-plugins-main python-compizconfig compizconfig-settings-manager
   compiz-plugins-extra

2.  In a terminal type “mateconf-editor”, when the editor opens go to
   /desktop/mate/session/required_components/windowmanager
     and replace "marco" with "compiz".

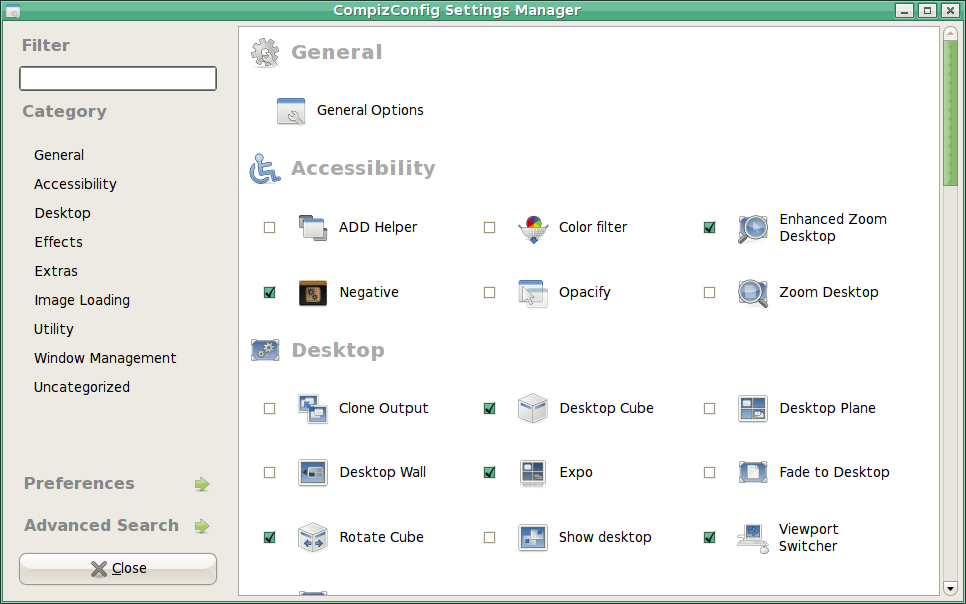
3.  Open the Compiz Configuration Settings Manager in the Control Center
      and select what compiz-functions you want to activate eg: Window
      Decoration, Move Window & Wobbly Windows at a minimum.

4,  Force Compiz to replace existing composter:
   compiz --replace

Sunday, July 15, 2012

Background Slideshow


Want to change those backgrounds automatically?  Install this handy background changer:
sudo add-apt-repository ppa:gwendal-lebihan-dev/gnome3-background-slideshow
sudo apt-get update
sudo apt-get install gnome3-background-slideshow

Thursday, July 12, 2012

Acidrip

AcidRip is the gold standard for ripping DVD's to AVI in Linux.  I've used it on more than one occasion to backup DVD's and it works like a charm.  It's been mentioned in heaps of "Best Five ..." pages (e.g.:  This One).  You can install it from the Software Manager (LinuxMint) or at the command line:
sudo apt-get install acidrip

Tuesday, July 3, 2012

Loads of Handy Wallpapers

These are great wallpapers because they don't overwhelm your desktop with crowded graphics.  I've made links to a couple of my favs.


Photo Album of Handy Wallpapers

Sockets and connecters

Saturday, June 23, 2012

How to Share a Symbolic Link in Samba

http://icesquare.com/wordpress/softlink-symbolic-link-doesnt-work-on-samba-solved/

Edit your samba configuration file:
sudo nano /etc/samba/smb.conf
Add the following into the global section, i.e.,
[global]
...
follow symlinks = yes
wide links = yes
unix extensions = no
...
Save your file and restart Samba:
sudo stop smbd
sudo start smbd 
It should work now.

Thursday, June 21, 2012

Adding Addtional Drives to a Zentyal Server

This page gives a handy guide to installing additional drives in a Zentyal server (which I've shamelessly copied and pasted ~ for easy usage).

Partition Disks

Open the Administrator Console from the Desktop


In console Type:
sudo fdisk –l
This will give a list of Disks attached to the system:
  • sda contains the system and swap partitions
  • sdb is the first disk
  • sdc is the second disk
  • sdd is the third disk


Open gparted and create a primary partition on each of the disks sdb, sdc & sdd. I created these with an ext4 file system. It is not necessary at this point to provide a volume label or mount point, as this will be done in the following steps.


Next, Open the PCMan File Manager
At the bottom left, click on the folder icon. This will provide a directory tree. Navigate to /media and click once on this folder in the directory tree. In the top menu, click on tools, and then open this folder as root. This will allow you to create folders and change permissions for those folders. The second screen shows the media folder opened in superuser mode.


Right click in the empty space to bring up the context menu and create folders in /media for the three disks. I used: Disk1, Disk2 and Parity.


I edited the permissions for these folders and changed the username to my username, changed the group to fuse, and gave full permissions to all. This may not be necessary. Right Click on each folder, select properties and then the permissions tab.


Close the media folder superuser window. Navigate in the directory tree to /etc and open this folder as root. Scroll down and find the file called fstab. Right click on the file and select open with leafpad.


This is the original fstab


Add the following lines to the end of fstab:
/dev/sdb /media/Disk1 ext4 defaults 0 2
/dev/sdc /media/Disk2 ext4 defaults 0 2
/dev/sdd /media/Parity ext4 defaults 0 2


Save the fstab file and exit leafpad.