Sunday, October 29, 2017

Linux Mint 18.2 Enable Autologin


Edit the configuration file /etc/lightdm/lightdm.conf manually. From the terminal run this command to edit that file:
gksudo xed /etc/lightdm/lightdm.conf

Under the [SeatDefaults] heading change there should be a line autologin-user= (it may have a # in front of the line, remove that character to activate the line). Add your username (in lower case) after the = on this line (if you're unsure of your username run whoami on a terminal).

https://forums.linuxmint.com/viewtopic.php?t=250723

Tuesday, September 5, 2017

Mac Mini Wireless Not Working Correctly After Installing Linux Mint


If you find that your Mac Mini's wireless card is not working correctly after installing Linux Mint (mine was not displaying available wireless networks) try these steps:

first make you you've got the right driver (my Mac Mini needs the Broadcom BCM4321 802.11a/b/g/n driver):

sudo apt update
sudo apt install firmware-b43-installer
sudo reboot

If that doesn't resolve the problem try switching drivers (in my case the wl driver seems to be the problem):

sudo modprobe -r wl
sudo modprobe b43

Check to see if wireless networks are displayed, if so then add the wl driver to the blacklist:

sudo touch /etc/modprobe.d/blacklist.conf
sudo echo "blacklist wl" >> /etc/modprobe.d/blacklist.conf

The b43 should then become the default driver.
You may need to manually edit the blacklist file with elevated privileges
eg: 

# blacklist wl driver as it wont list available wireless networks
#https://www.linuxquestions.org/questions/linux-networking-3/ubuntu-16-04-mac-mini-2009-broadcom-driver-selected-and-wlan-enabled-but-home-network-does-not-show-4175600634/
blacklist wl 

See original article here.

Monday, September 4, 2017

Installing Linux Mint on a Mac Mini


Here's how to go about installing Linux on a Mac:
  1. Download your Linux distribution to the Mac. I recommend Linux Mint 18.2 MATE (64-bit) if this is your first Linux install. Save the file to your Downloads folder.
  2. Download and install an app called Etcher from Etcher.io. This will be used to copy the Linux install .ISO file to your USB drive.
  3. Open Etcher and click the Settings icon in the top-right. Place a tick in Unsafe Mode and click Yes, Continue. Then Click Back.
  4. Click Select Image. Choose linuxmint-18.2-mate-64bit.iso (or the image you downloaded in Step 1).
  5. Insert your USB Thumb Drive. A reminder that the US Flash drive will be erased during this installation process. Make sure you've got nothing you want on it.
  6. Click Change under Select Drive. Look carefully and pick the drive that matches your USB Thumb Drive in size. It should be  /dev/disk1 if you only have a single hard drive in your Mac. Or /dev/disk2, /dev/disk3 and so on (if you have more drives attached). Do not pick /dev/disk0. That's your hard drive. Pick /dev/disk0 and you'll wipe your macOS hard drive You've been warned!
  7. Click Flash! Wait for the iso file to be copied to the USB Flash Drive.
  8. Remove the USB Flash Drive from your Mac.
  9. Shut down the Mac you want to install Linux on and attach the USB stick.
  10. Power up the Mac while holding down the Option key.
  11. Choose the EFI Boot option from the startup screen and press Return.
  12. You will see a black and white screen with options to Try Ubuntu and Install Ubuntu. Don't choose either yet, press "e" to edit the boot entry.
  13. Edit the line that begins with Linux and place the word "nomodeset" after "quiet splash". The whole line should read: "linux /casper/vmlinuz.efi            file=/cdrom/preseed/ubuntu.seed boot=casper quiet splash nomodeset --. (See screenshot, below.)
    Install Linux on a Mac using nomodeset
    Above: Step 13 (click on image to expand)
  14. Press F10.
  15. Linux Mint boots into trial mode.
  16. Double-click the icon marked "Install Linux Mint".
  17. Select English and choose Continue.
  18. Select "Install this third-party software" option and click Continue.
  19. Click Yes to the /dev/sdb alert.
  20. Select "Erase disk and install Linux Mint" and click Continue.
  21. Ensure that Select Drive is displaying the main hard drive. Click Install Now. Click Continue in the alert window.
  22. Select your location on the map and click Continue.
  23. Choosing your keyboard layout and click Continue.
  24. Enter the name and password you want to use.
  25. Click Continue and Linux Mint will begin installing.
  26. When the installation has finished, you can log in using the name and password you chose during installation.
When you install Linux on your Mac, it removes all of the OS X installation including the recovery partition. If you want to reinstall OS X, you'll have to create an OS X recovery disk using the thumb stick.

Thursday, August 25, 2016

Upgrade WINE (Fixes Issue with Mp3Tag Under PlayOnLinux)


If your system is 64 bit, enable 32 bit architecture (if you haven't already):
sudo dpkg --add-architecture i386 
Add the repository:
sudo add-apt-repository ppa:wine/wine-builds
Update packages:
sudo apt-get update
Then install (example for the development branch):
sudo apt-get install --install-recommends winehq-devel

Monday, May 16, 2016

Install More Screensavers Linux Mint Mate Version


If you want to add additional screensavers in Linux Mint Mate edition use the following commands:


sudo apt-get install xscreensaver-data-extra xscreensaver-gl-extra
cd /usr/share/applications/screensavers
sudo perl -p -i -e 's/OnlyShowIn=GNOME;/OnlyShowIn=GNOME;MATE;/g' *.desktop

Monday, May 4, 2015

Create A Suspend Button For Linux Mint 17


You'll need to create a new "Launcher" from the desktop and make sure "Type" is set to "Application":

Name it "Suspend" and for "Command" use: "dbus-send --system --print-reply     --dest="org.freedesktop.UPower"     /org/freedesktop/UPower     org.freedesktop.UPower.Suspend"


 Download this handy suspend icon image and then use it to set the icon for the launcher by clicking on the icon button:

Thursday, April 30, 2015

Setup VPN On Linux


If you require a secure connection to protect your computer and personal information from dangerous malwares, then using a VPN is a good way to start. A virtual private network does not only mask your identity over the web so your internet activity cannot be traced to your device, it also offers you access to geo-restricted sites such as Netflix and Spotify. So you can actually enjoy restricted content from around the world, and still have your back covered from spying.

More here: http://secureknow.com/how-to-guides/setup-a-vpn-on-linux/

Friday, January 30, 2015

How to upgrade your MacBook with an SSD


What you'll need:
Step 1: Prep the SSD
Connect the SSD to your Mac with SATA-to-USB cable.  Once it's connected, launch Disk Utility, and select your drive from the left sidebar.  Then, head to the Erase tab, and click Erase.  No need to change any settings, unless you'd like to give it a new name. This will format the drive and prep it for the next step.
Launch SuperDuper, and set it to clone your Mac's hard drive to the SSD. Then choose Backup All Files, and click Copy Now.  When the process is complete, eject the SSD and shut down your computer.

Step 2: Remove the hard drive
Begin by removing your MacBook's back cover.  There are 10 screws in total, including three longer ones. To remove the hard drive, use the regular screwdriver to unscrew the two black screws belonging to the bracket securing the hard drive.  Remove the bracket and set it aside.
Gently lift the hard drive.  You'll see that a ribbon is attached to one end.  Carefully wiggle the connector -- not the ribbon itself -- to disconnect it.  Remove the four torx screws attached to the hard drive and set aside.

Step 3: Install the SSD
Grab the SSD and screw in the four torx screws you removed from the hard drive. Then attach the ribbon to the SSD, and insert the drive in the same configuration as the previous drive.  Re-attach the bracket. And finally, replace the back cover using the 10 screws.  Now turn on your computer. It may take a couple of extra seconds as it gets acquainted with the new drive, but starting up your computer will be much faster than the in past.

http://www.cnet.com/how-to/upgrade-your-macbook-install-ssd-hard-drive/

Monday, December 29, 2014

How To Easily Mount Drives At Startup


PySDM is a GUI to manager fstab (/etc/fstab) and allows customizing hard disk mountpoints, creating dynamic udev rules, etc.   Use this handy guide to ensure you have auto mounted drives at startup.

Sunday, December 28, 2014

How To Update Flash Player


If you find that your version of Adobe Flash is out of date try this:

sudo apt-get --reinstall install flashplugin-installer

Thursday, December 25, 2014

How many GNU/Linux users are needed to change a light bulb?

  • 1 to post a thread in a mailing list telling the bulb has burnt.
  • 1 to suggest to try to turn the lamp on through command lines.
  • 1 to complain that the user broke the thread.
  • 1 to ask what new bulb will he install.
  • 1 to advice that we shouldn't use the word burn for meaning a broken lightbulb, because it would mean that the bulb was set on fire and that it would be right to say that the bulb broke due to an excess of electrical current.
  • 25 to suggest to install all the kinds of existing and imaginable lightbulbs.
  • 5 who say that the burnt bulb is an upstream issue that doesn't belong to the distro. There's an open bug on the bulb's developer mail list.
  • 1 noob to suggest to install a Microsoft lightbulb.
  • 250 to flood the noob's mail address.
  • 300 to say that a Microsoft lightbulb would turn blue and that you'd had to reboot continuously to get back to normal.
  • 1 former GNU/Linux user who http://www.gnu.org/fun/jokes/users-lightbulb.html
    http://www.gnu.org/fun/jokes/users-lightbulb.html
    still frequents the forum, to suggest to install an Apple iBulb, which has a fresh and innovating design and it costs $250.
  • 20 to say that iBulbs aren't free, and that they have less functions than a 20 times cheaper standard lightbulb.
  • 15 to suggest to install a national lightbulb.
  • 30 to say that national lightbulbs are crippled remasters of foreign lightbulbs and that they don't bring anything new.
  • 23 to argue if it must be a white or a transparent bulb.
  • 1 to remind everyone that the right name is GNU/Lightbulb.
  • 1 to say that lightbulbs are a Winbugs users thing and that real GNU/Linux users aren't afraid of the dark.
  • 1 to announce finally which will be the model of the installed bulb.
  • 217 to discard the chosen model and suggest another.
  • 6 to complain that the chosen lightbulb has proprietary elements, and that another should be used.
  • 20 to say that a 100% free bulb, isn't compatible with the lamp switch.
  • The same previous 6, to suggest to change the switch for a compatible one.
  • 1 to yell out: “STOP ARGUING AND CHANGE THAT LIGHTBULB FOR GOD'S SAKE!”
  • 350 to ask the previous user what God is he talking about, and that if he has scientific proofs of His existence.
  • 1 to explain how electricity works and why a light bulb is inefficient.
  • 1 to say that we can't trust in corporation-made bulbs and that we should trust in community-made bulbs.
  • 1 to post a link to an ODF file explaining how to build a lightbulb from scratch.
  • 14 to complain about the format of the previous file and asking to send it in txt or LaTeX.
  • 5 to say that they didn't like the taken decision and that they'll fork the house's electric installation and install a better lamp.
  • 1 to post a series of commands to put to change the lightbulb.
  • 1 to comment that he executed the commands and had an error message.
  • 1 to advice that the commands must be executed as root.
And finally:
  • The father of the first user, who while everyone was discussing, went to the shop and bought the cheapest lightbulb.

Disclaimer

The joke on this page was mailed to the FSF by its author Andre Machado.

http://www.gnu.org/fun/jokes/users-lightbulb.html

Wednesday, September 24, 2014

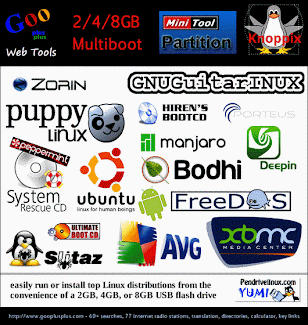
USB Multiboot Collection - Gooplusplus / YUMI

http://www.gooplusplus.com/multiboot-collections/

Collections of YUMI-based Multiboot 2/4/8GB Instructions and Documentation

http://www.gooplusplus.com/multiboot-collections/

Tuesday, July 8, 2014

The Big Byte: Linux Printer Drivers - Fuji Xerox DocuPrint P255 dw


Thanks to "The Big Byte" Blog its possible to setup a Fuji Xerox DocuPrint P255 DW under Linux.  You'll need to download the PPD file after setting the printer up on the network.

Tuesday, February 25, 2014

Getting exFAT To Work Under Linux Mint

exFAT (Extended File Allocation Table) is a proprietary file system designed especially for flash drives developed by Microsoft, which has applied for patent protection. - See more at: http://rayslinux.blogspot.com.au/2013/08/how-to-mount-exfat-file-system-on.html#sthash.z5mH74rw.dpuf
exFAT (Extended File Allocation Table) is a proprietary file system designed especially for flash drives developed by Micro$oft, which has applied for patent protection.  exFAT is used where the NTFS file system is not a feasible solution, due to data structure overhead, or where the file size limit of the standard FAT32 file system (without FAT+ extension) is unacceptable.

sudo apt-get update && sudo apt-get install exfat-utils

Wednesday, February 19, 2014

Install Oracle Java 7 in Ubuntu or Linux Mint via PPA


If you need to use Java in Linux Mint you'll need to install it.  This is the easiest way I've found to install it.

sudo add-apt-repository ppa:webupd8team/java
sudo apt-get update
sudo apt-get install oracle-java7-installer

Sunday, January 26, 2014

Solaar for Logitech devices


Solaar is a Linux device manager for Logitech’s Unifying Receiver peripherals. It is able to pair/unpair devices to the receiver, and for most devices read battery status. It comes in two flavors, command-line and GUI.  Both are able to list the devices paired to a Unifying Receiver, show detailed info for each device, and also pair/unpair supported devices with the receiver.


Saturday, November 30, 2013

Raspberry Pi Bundle- Preloaded XMBC

Put these two products together and you have a fully functioning XBMC media server for next to nothing:

Raspberry Pi Model B (512MB)
Pre-Programmed 4GB SD Card, Clear Case, USB Mains Plug AU
Features: Credit card size video computer, HDMI, Ethernet & 2 USB ports, Linux's Debian software, 512MB RAM
Clock Frequency Max: 700MHz


XBMC Raspberry Pi Bundle
For Use With: Raspberry Pi
Kit Contents: Mini Keyboard, Preloaded XMBC SD Card, HDMI Cable, CAT5E Cable

Tuesday, November 26, 2013

MintBox 2 Linux Mint Computer


The MintBox 2 is a mini-computer which connects to TVs or computer monitors via HDMI or DisplayPort. It comes with 8 USB ports as well as in/out audio jacks, eSATA, Ethernet, Wifi and Bluetooth so you can connect it easily to any network or device.  It’s small, about the size of a router, so it fits behind your keyboard, your TV and it’s easy to bring with you anywhere you go.  It’s extremely sturdy and completely silent. There is no plastic, the case is entirely made of solid die-cast aluminum and acts as a heat sink, so there are no fans inside of it.


More here: http://blog.linuxmint.com/?p=2441